WYSIWYG Toolbar
The toolbar at the top of the editing window contains much of the same functionality as common word processors, such as font styling and alignment, spellcheck, and lists, as well as the ability to insert content like images, tables, links, snippets, assets and components (snippets, assets and components are Omni-specific elements that will be discussed in section 8). To save your changes and exit the editable region, select the Save and Exit icon in the very top left corner of the toolbar or the blue save button on the top right.
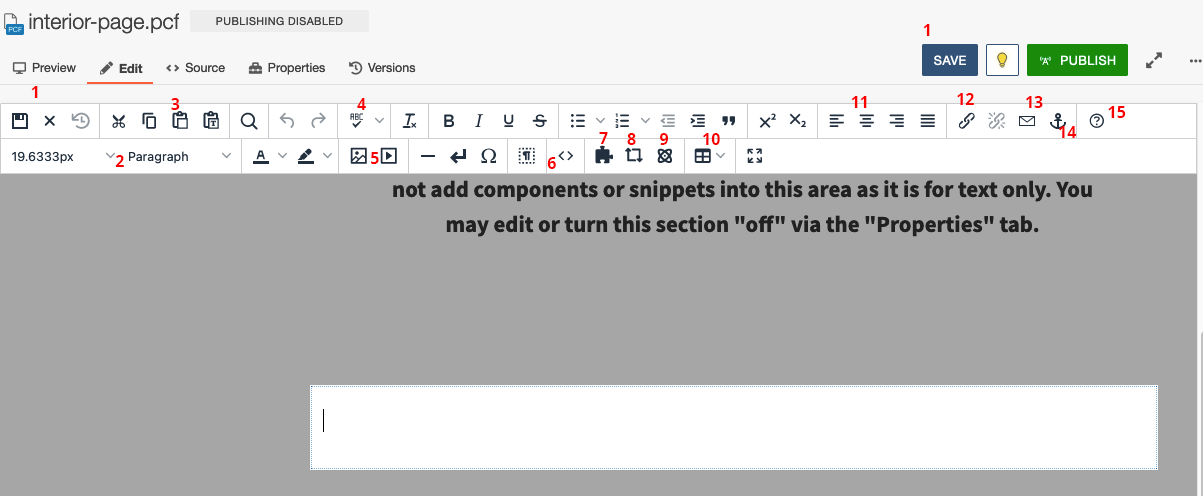
What’s on the WYSIWYG Toolbar:
- Save and Exit buttons.
- Styles: use the paragraph, heading and other styles to change the text size and create emphasis.
- Paste: This will paste the latest item from your clipboard. The WYSIWYG will bring some, but not all, formatting from the word processor in when something is pasted, which can cause unexpected page behavior and formatting issues. To avoid this, use the paste as text option to remove styling.
- Spell Check Tool.
- Image and Video Tools: This will open the insert image or video dialogue box.
- Code Peek (advanced users only): This will let users see the HTML code for the content in the WYSIWYG.
- Snippet Tool: Allows users to select and insert snippets into the page.
- Asset Tool: Allows user to insert assets into the page.
- Component Tool: Allows users to insert layout components into the page. This tool is very useful for quickly creating quality layouts for both text and images.
- Table Tool: Allows the users to create a table. Tables can also be created by copying from Microsoft Excel.
- Alignment: alignment can be used for text and images. Images will be “floated” to the left or right with alignment, which will allow text to be displayed next to them on the other side.
- Link Tool: Allows the users to create links.
- Mail To Tool: Creates a mail-to weblink to embed emails into a page.
- Anchor Tool: Creates HTML Anchor tags to facilitate linking within a page.
- Help Button.