Hero Options
Setting a Hero Image in Omni
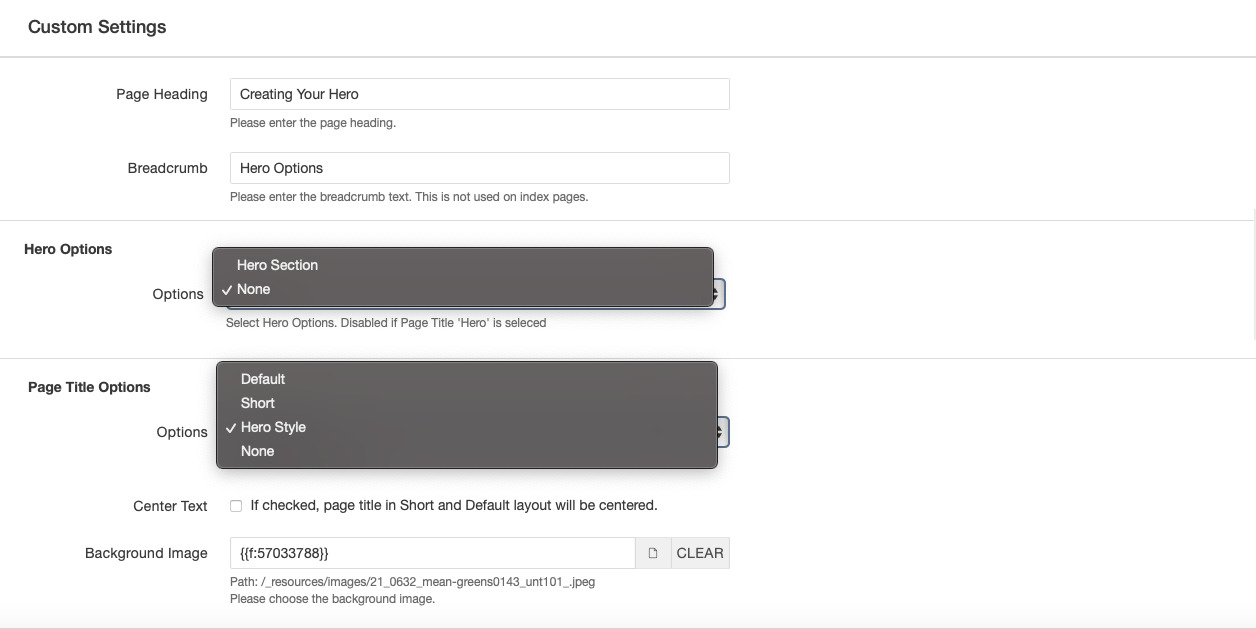
There are many different hero options to choose from, depending on what you are looking for and how much information is needed right at the top of your page. Inside the page parameters, under custom settings, users can set hero options from None to Hero Section.
Step 1.
Find the Properties page.
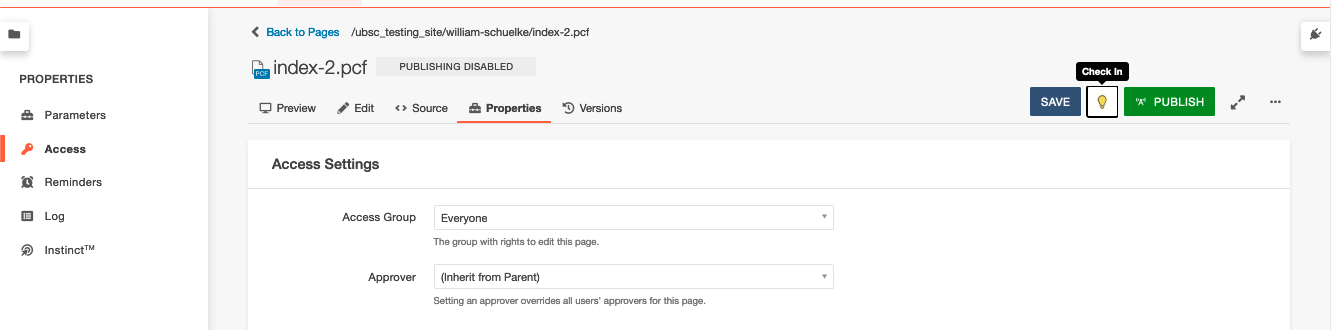 Make sure you have the page checked in so you can access the hero content within properties.
Step 2.
Scroll down until you see the two sections needed: Hero Options and Page Title Options.
Step 3.
Choose what type of Hero you would like to use.
There are a few options and combinations to choose from:
There are five types of Hero Options for your Hero
Hero Options: None
Page Title Options: Default

Hero Options: None
Page Title Options: Default (

Hero Options: None
Page Title Options: Short

Hero Options: None
Page Title Options: Short - Centered

Hero Options: None
Page Title Options: Hero Style
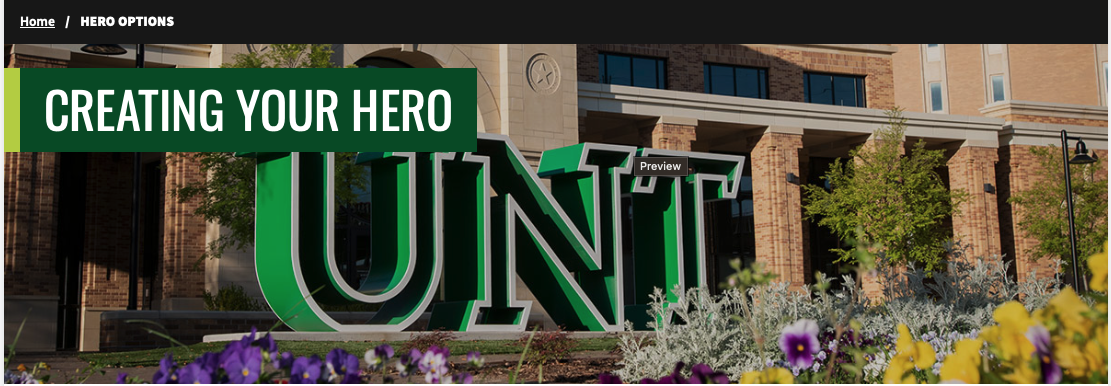 This is a great option for a nice image that doesn't take away from your page, especially
if you have no need for CTAs.
This is a great option for a nice image that doesn't take away from your page, especially
if you have no need for CTAs.
Hero Options: Hero Section
Page Title Options: None
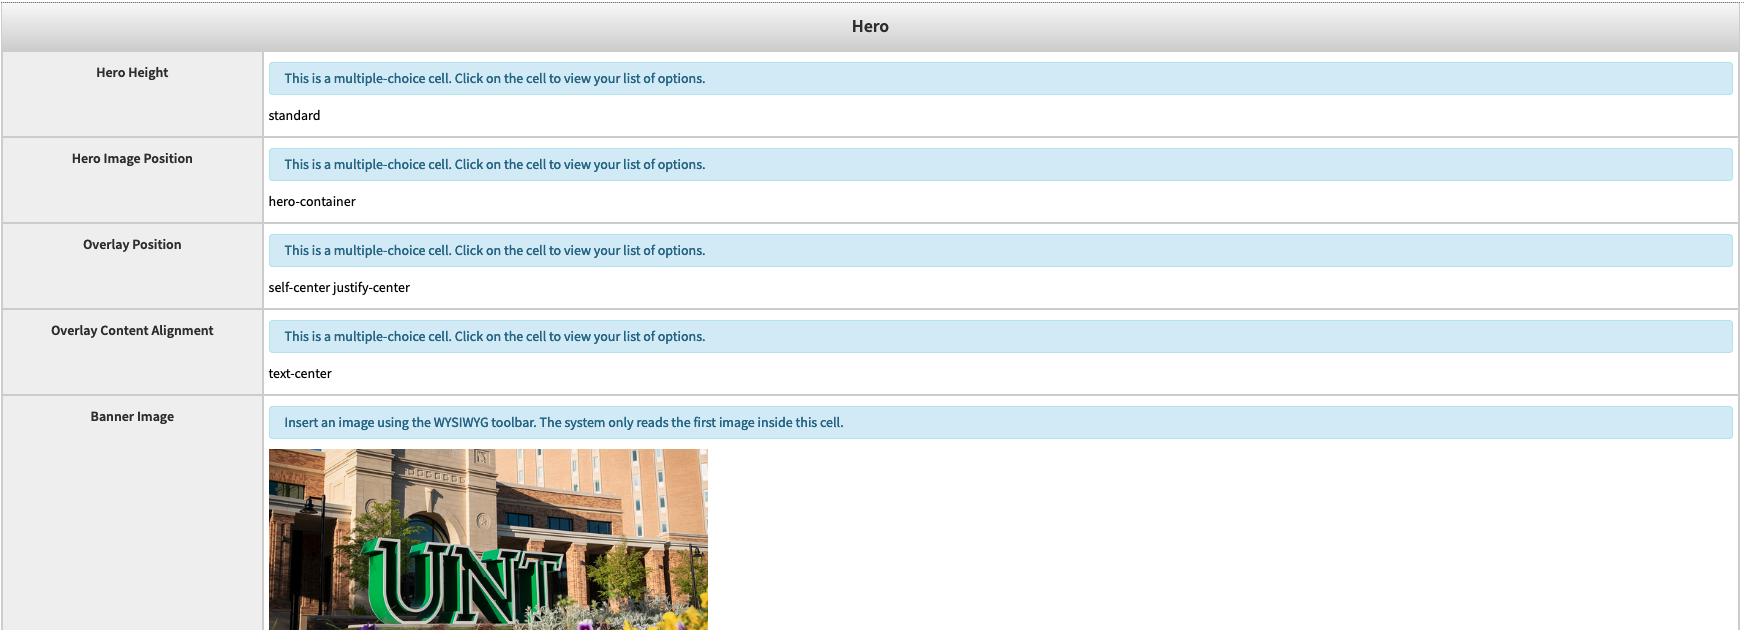
With the "Hero Section" type of hero, we can change the size of the hero, the hero
image position, text overlay position, overlay content alignment, choose an image
or video, heading caption, and CTAs.
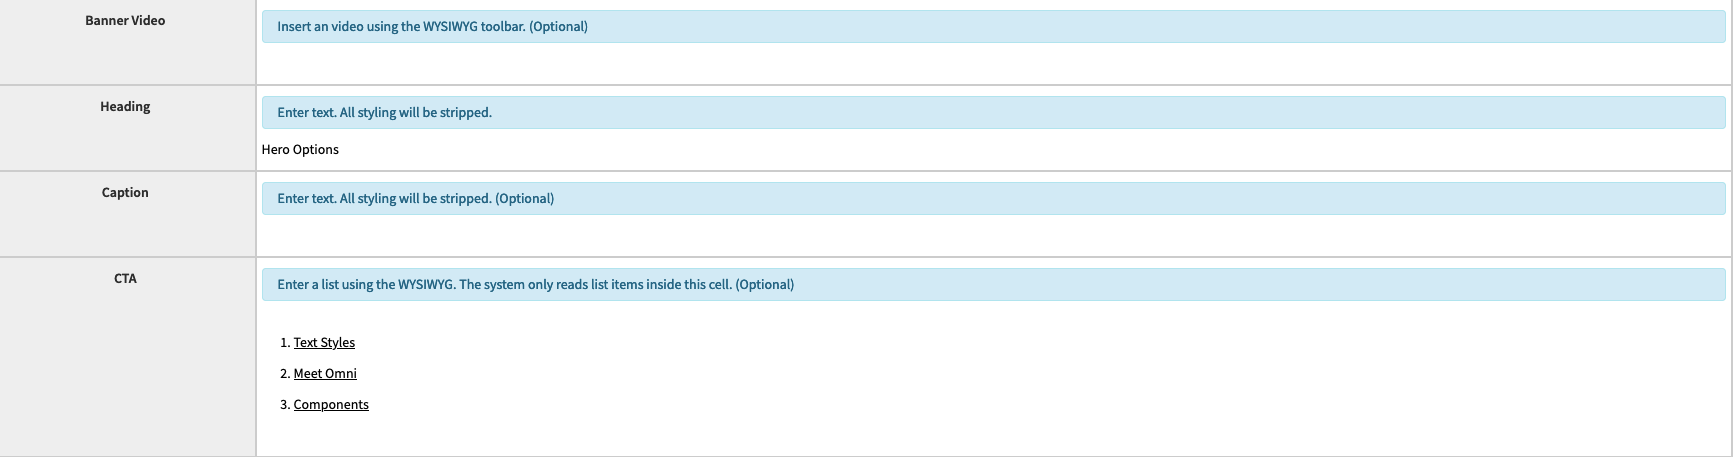
CTAS
To add and edit your CTA buttons, you will need to go to edit Hero Content. At the CTA section, you will add each of the words you want to use as your CTA and link it to a destination page. To make sure the CTA is going to work, each CTA needs to be listed in bullet points and hyperlinked.
See the example bellow:

**If you ened your CTAs in a certain order, we recommend paying attention to the order of your CTAs in the bulleted list. As seen above, We listed our CTAs 1, 2 and 3 to keep track of where they are in the list. If you look below, 1 and 2 are swapped so its prints 2, 1 and 3. We are still working on this bug, and will update once it is fixed.
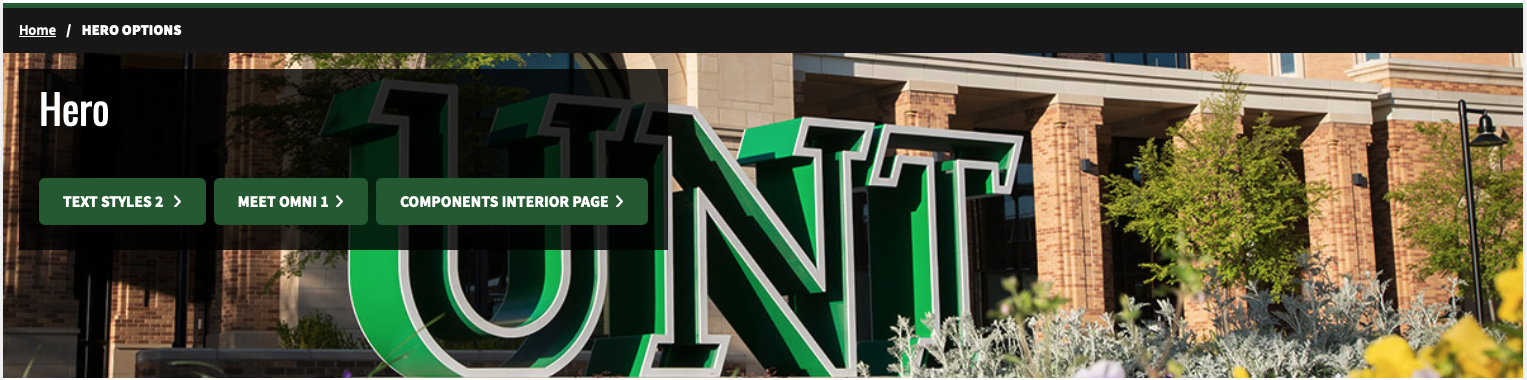
If order of your CTAs matter, swap CTA 1 and 2 in the bulleted list to have the correct order in your CTAs.

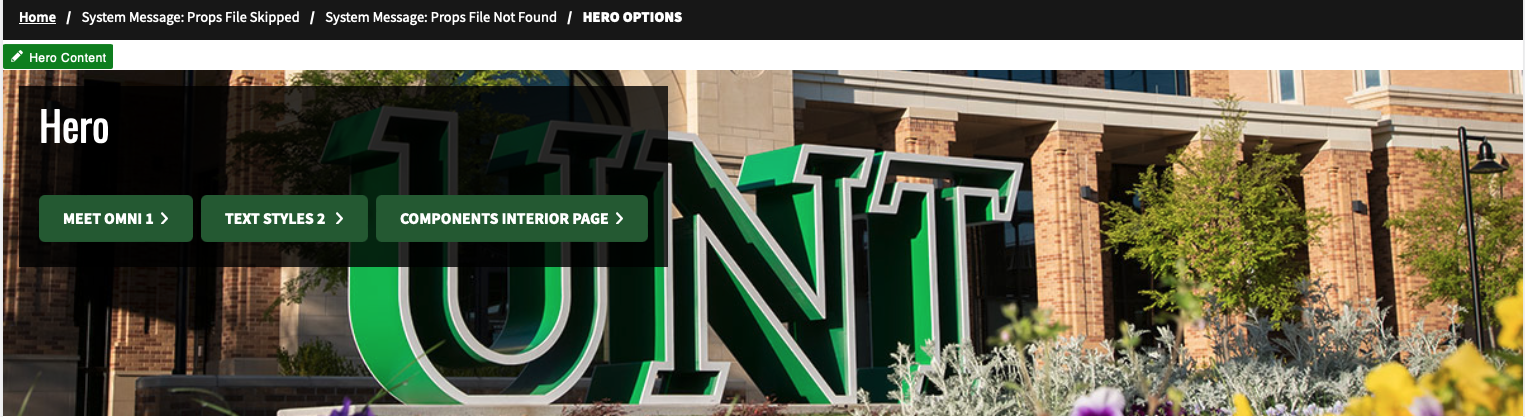
Once you swap 1 and 2, your order will then print correctly (as seen below).
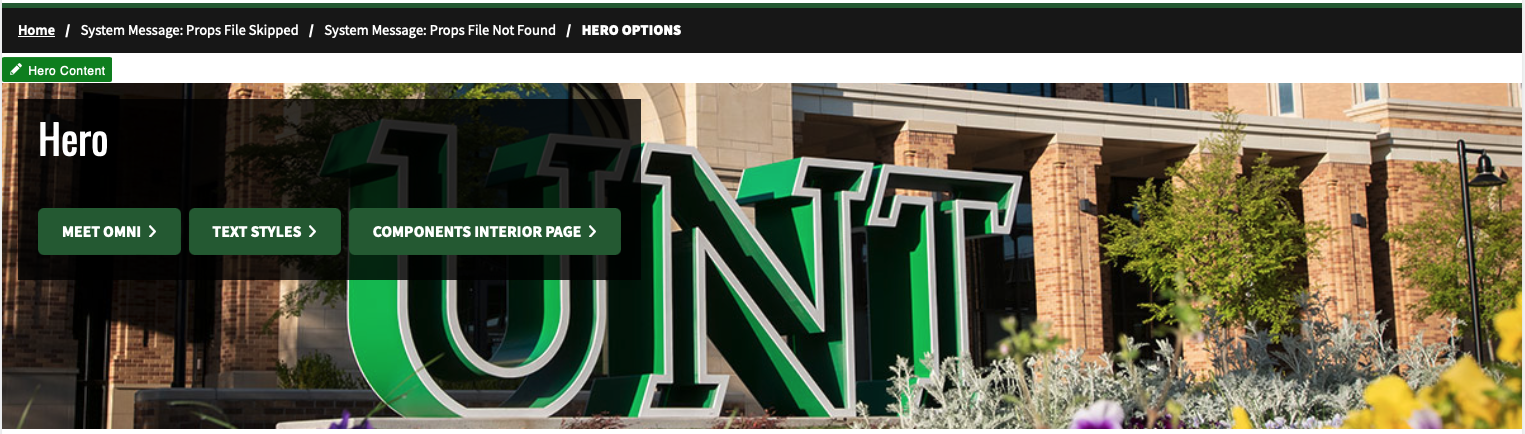
Once we have the correct order, you can delete the numbers in your CTAs. It should now print correctly.
Hero Options: None
Page Title Options: None
This setting is for those who choose not to have a Hero in their pages. It's a great option for Interior Pages or pages with no need for CTAs and images.

What size should a Hero Image be?
In Omni, only one image is uploaded for the hero banner. This means that it needs to work well across screen sizes and be optimized for the web. Some tips for getting the image right:
-
In an offline editor (like Photoshop) crop the image to a 16:9 ratio. When cropping, pay attention to select the focus on the image on the “action,” such as a person’s face. This is important because otherwise the image may load with the focus cut off.
-
Resize the image (after it is 16:9) to be 1600px across. This will make sure that the image won’t need to be stretched out on large screens.
-
Compress the image when saving so it is less than 500KB, 300-350 is generally a good target. This is very important for page load times, which is a factor in search engine optimization.